Stan Watson was among the first ashore at Gallipoli on 25 April 1915, and survived battle, fear and disease to build the pier at Anzac Cove from which so many men later escaped. He faced what seemed like an impossible mission: to get every man out alive. Watson never claimed to be the last man to leave Gallipoli, but through to the very end he played his part and became a hero.
Sixty-two years to the day after he stepped away from that fatal shore, Watson took a slow train to visit his family for Christmas and decided to finally tell his life story.
A beautifully told mixture of fact and fiction, Watson's Pier traces not just one man's journey, but the history of a nation. It also challenges the historical record of what happened in the final moments at Anzac Cove. In doing so, it offers a new perspective on the meaning of Gallipoli.
Gallery
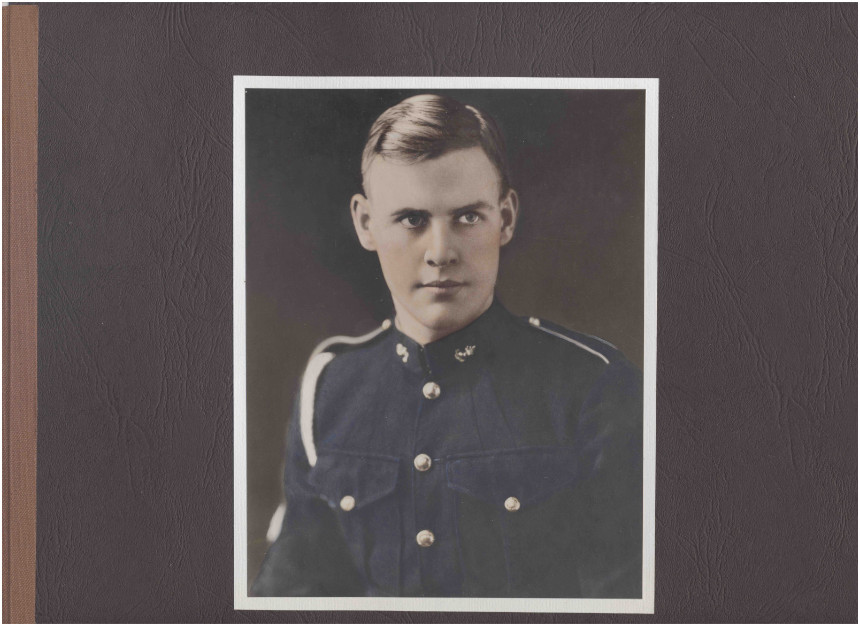
Lieutenant Stanley Holm Watson, 28th Divisional Signal Company, Adelaide circa 1911.
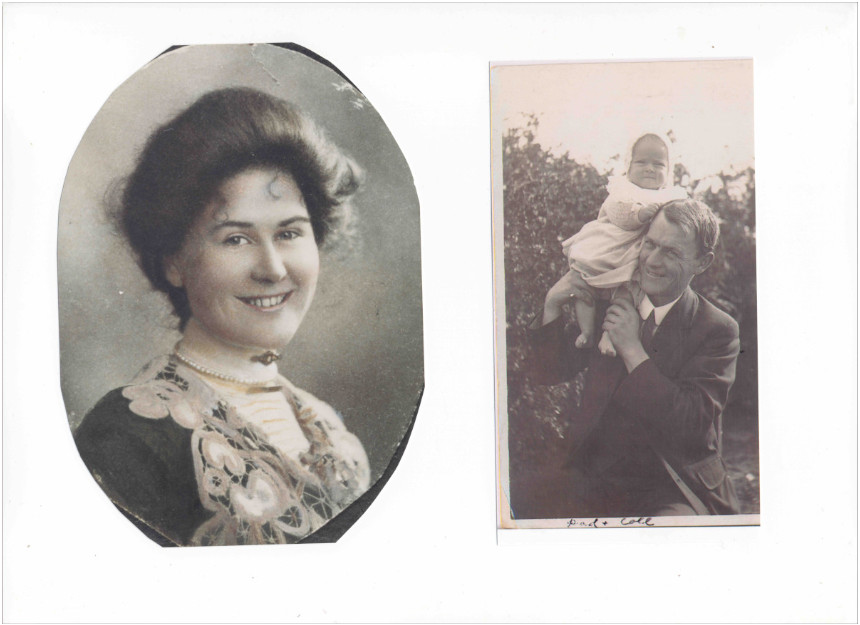
Left: Leila Vera Watson. Right: Stan with Col, circa 1913
Ruth and Col, 1915
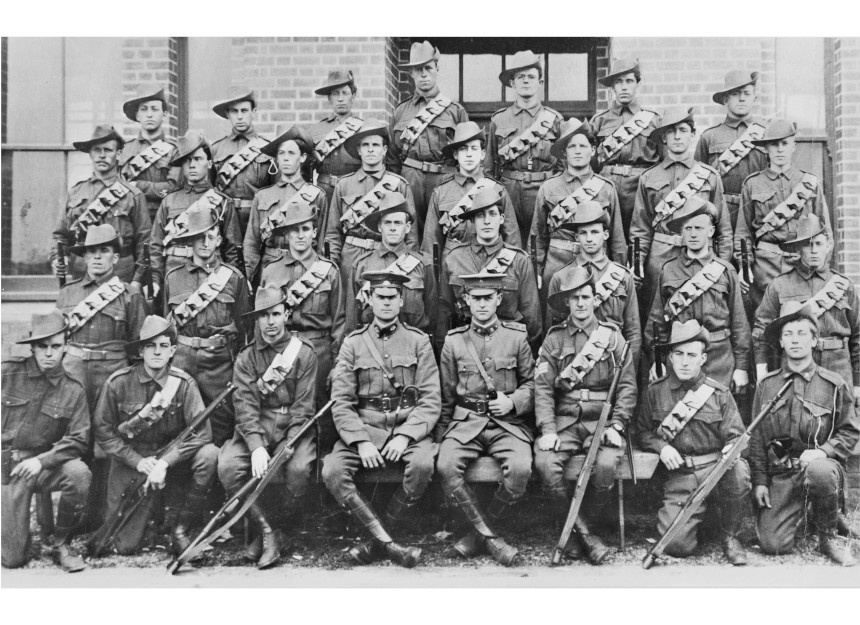
South Australian volunteers for the Signal Engineers, August 1914. Lieutenant S. H. Watson (fifth from the left, front row) and Sergeant Both (fifth from the left, back row).
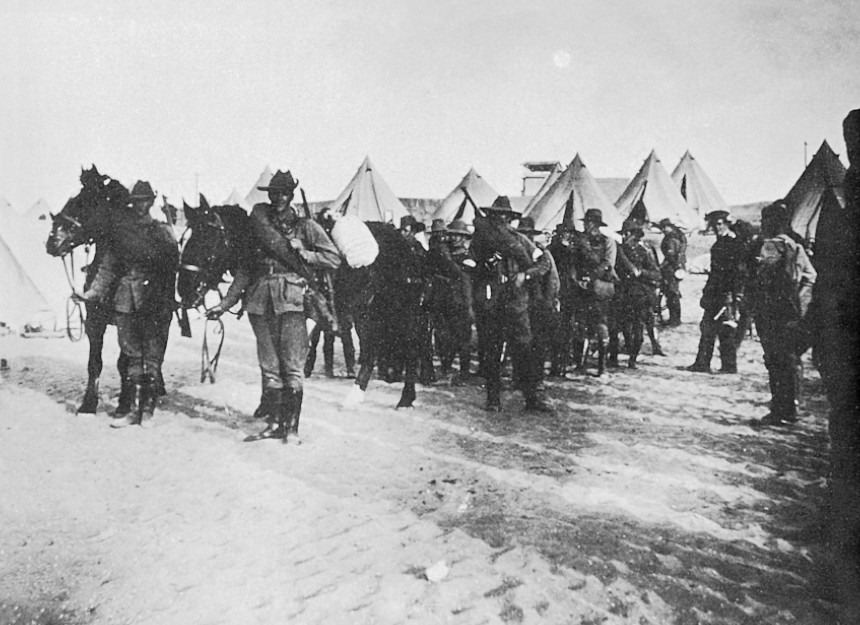
Sappers of No. 4 Section, 1st Divisional Signal Company, Egypt, March1915.
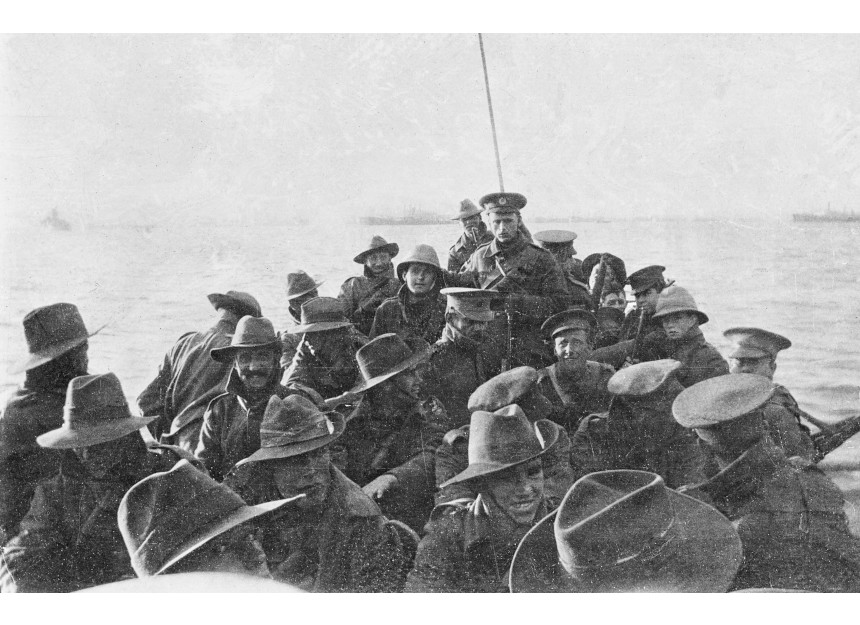
A view looking aft of lifeboat carrying men of the Australian 1st Divisional Signal Company as they are towed towards Anzac Cove at 6 am on the day of the landing, 25th April 1915.
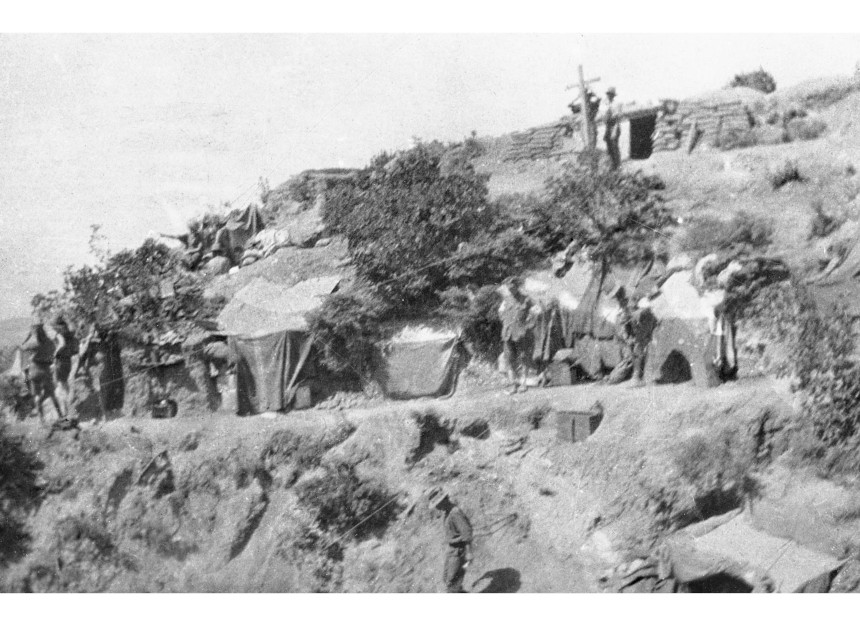
The dugouts at Anzac Cove occupied by the Headquarters of the 1st Australian Division. The lower terrace of dugouts was occupied by men of the Signal Company working with Divisional Headquarters.
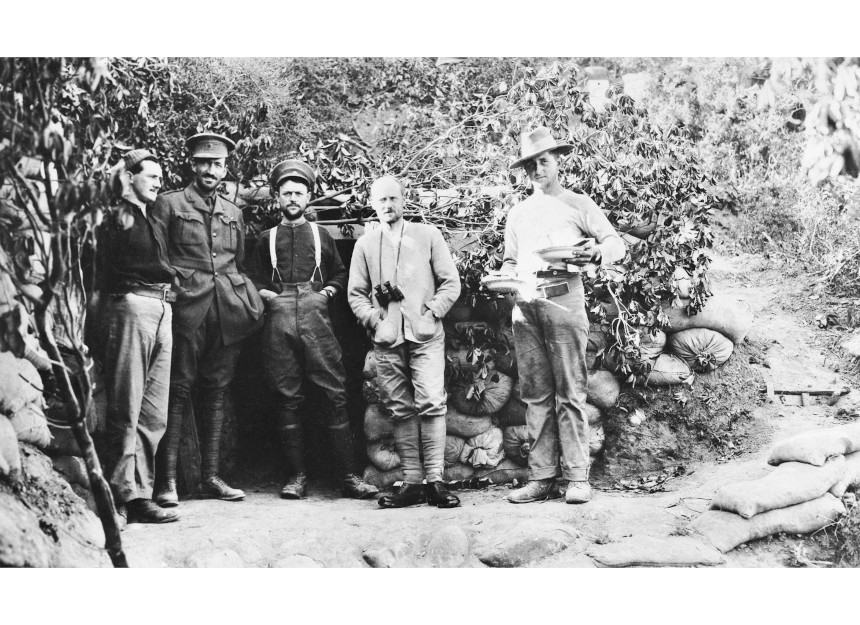
Officers of the 1st Division SignalCompany (unshaven) outside the headquarters signal section dugout at Anzac Cove. Major Henry Llewellyn Mackworth, commanding officer (second from left).Lieutenant Stanley Holm Watson (third from left). May 1915.
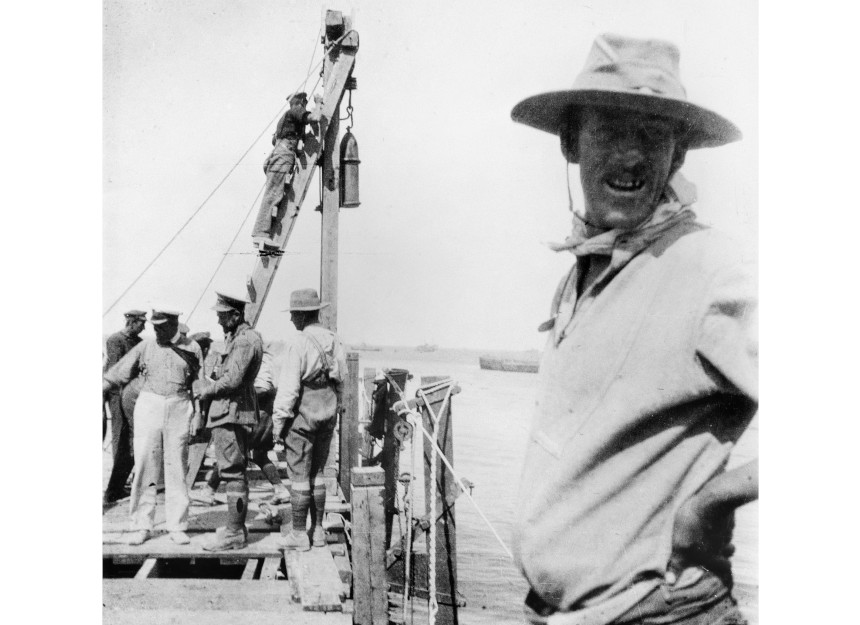
Seaward view of soldiers constructingWatson's Pier. A defused Turkish 9 inch shell was used as a pile driver.Lieutenant S. H. Watson (front, middle) supervising construction. June 1915.
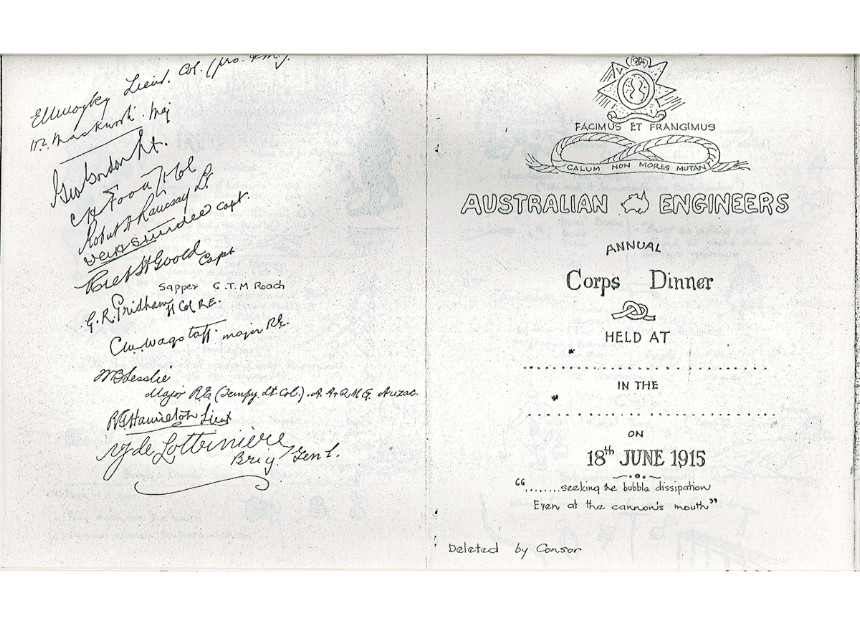
1 of 2: Signed menu from Waterloo Dinner at Anzac Cove, 18th June 1915. Menu drawn by Sapper Gilbert ‘Scrap Iron’Roach.
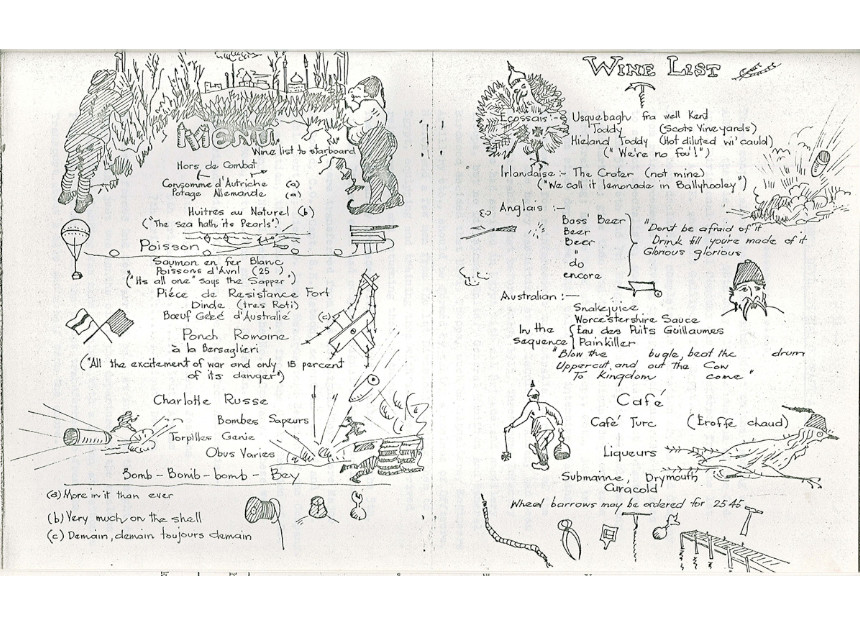
2 of 2: Signed menu from Waterloo Dinner at Anzac Cove, 18th June 1915. Menu drawn by Sapper Gilbert ‘Scrap Iron’Roach.
Watson's Pier extensively damaged after a severe storm. 17th November 1915.
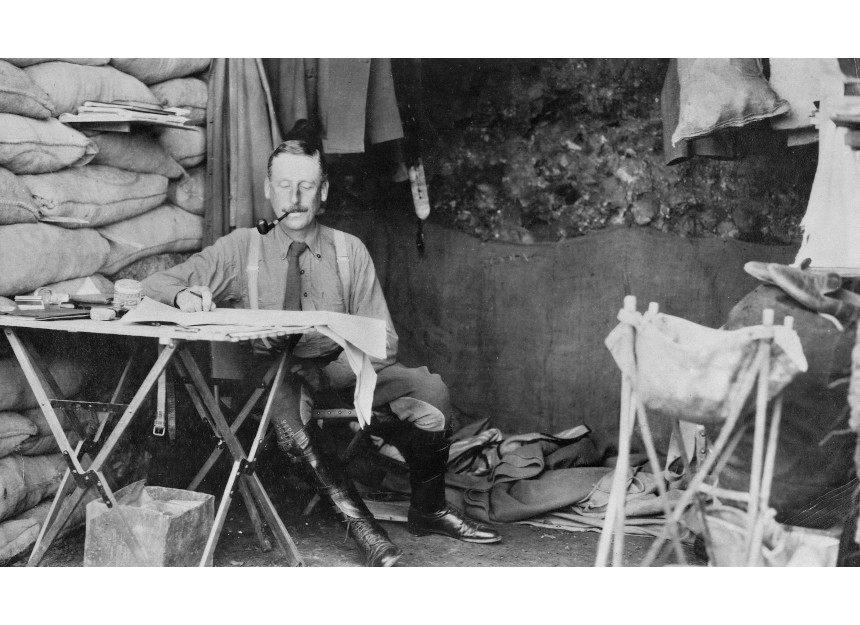
Lieutenant Colonel Cyril Brudenell Bingham White, Chief of Staff to the commander of the Australian Imperial Force, Lieutenant General Birdwood, works at a folding table at the entrance of his dugout.
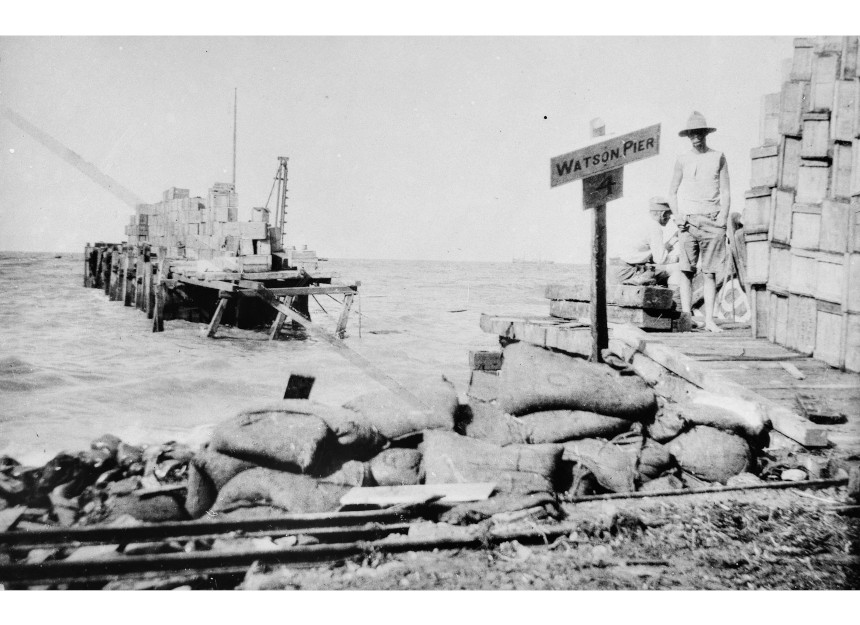
Looking down onto Watson's Pier. A shell is bursting on the Army Corps Headquarters.
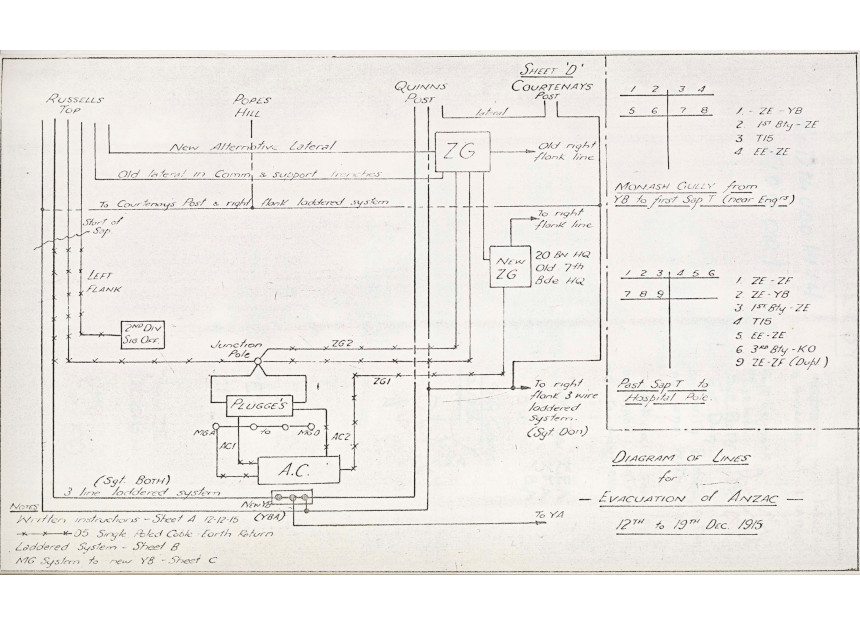
Map of new signals network constructed for the evacuation of Anzac. 12th December 1915.
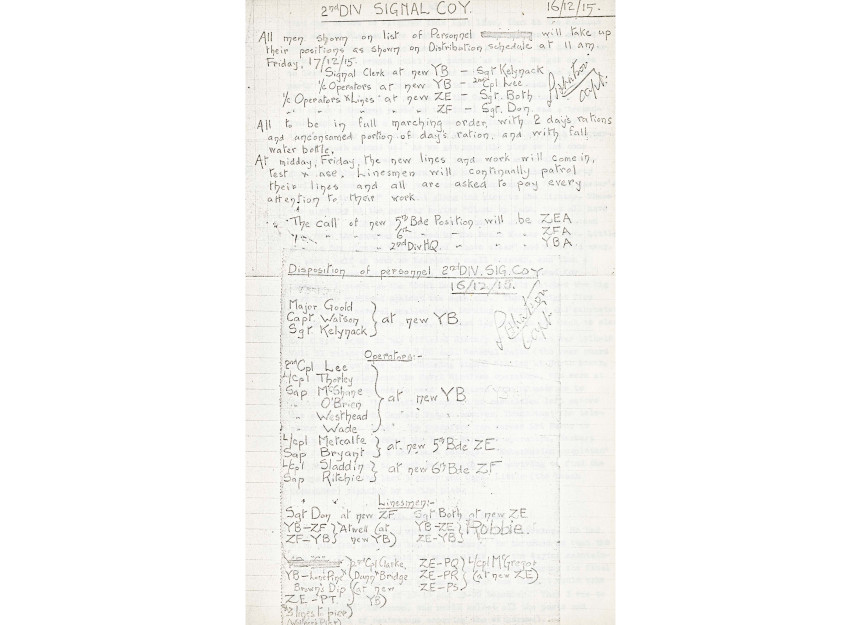
Watson’s List: list of sappers designated to remain to the last moment at Anzac. 16th December 1915
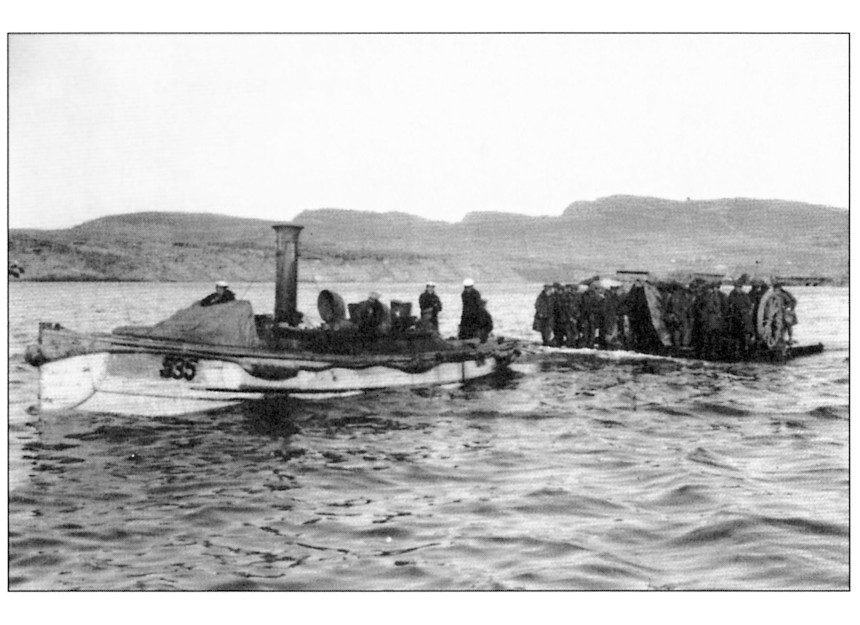
Troops being evacuated from Anzac. December 1915.
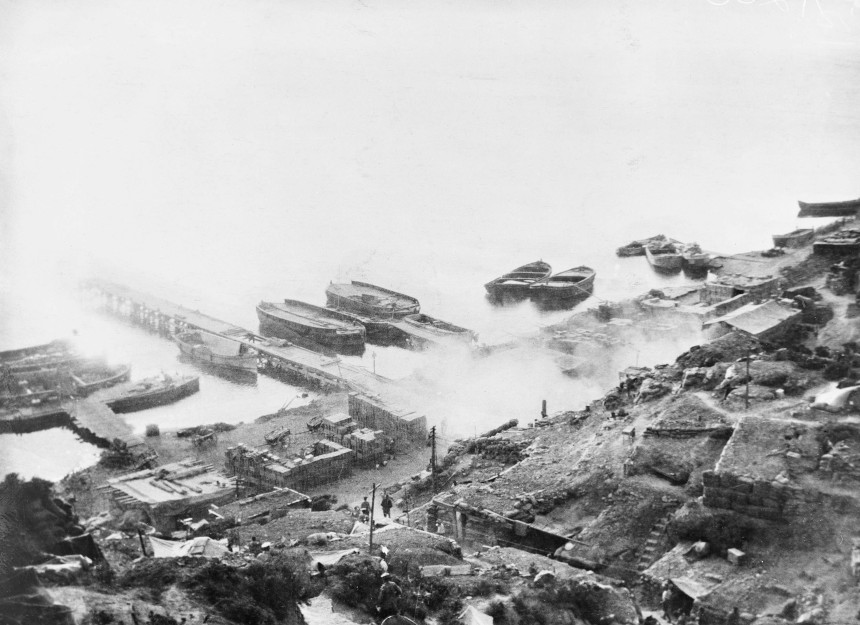
Anzac Cove after the evacuation taken from south point looking north, showing barges, boats, piers and three tanks scattered about the beach. AustralianHistorical Mission, Feb-Mar, 1919.